
Home Port Lights Installation Instructions
Tools You’ll Need
Phillips screwdriver
Power drill
¼” drill bit
Ladder
Pencil or black marker

Step 1: Check Your Kit
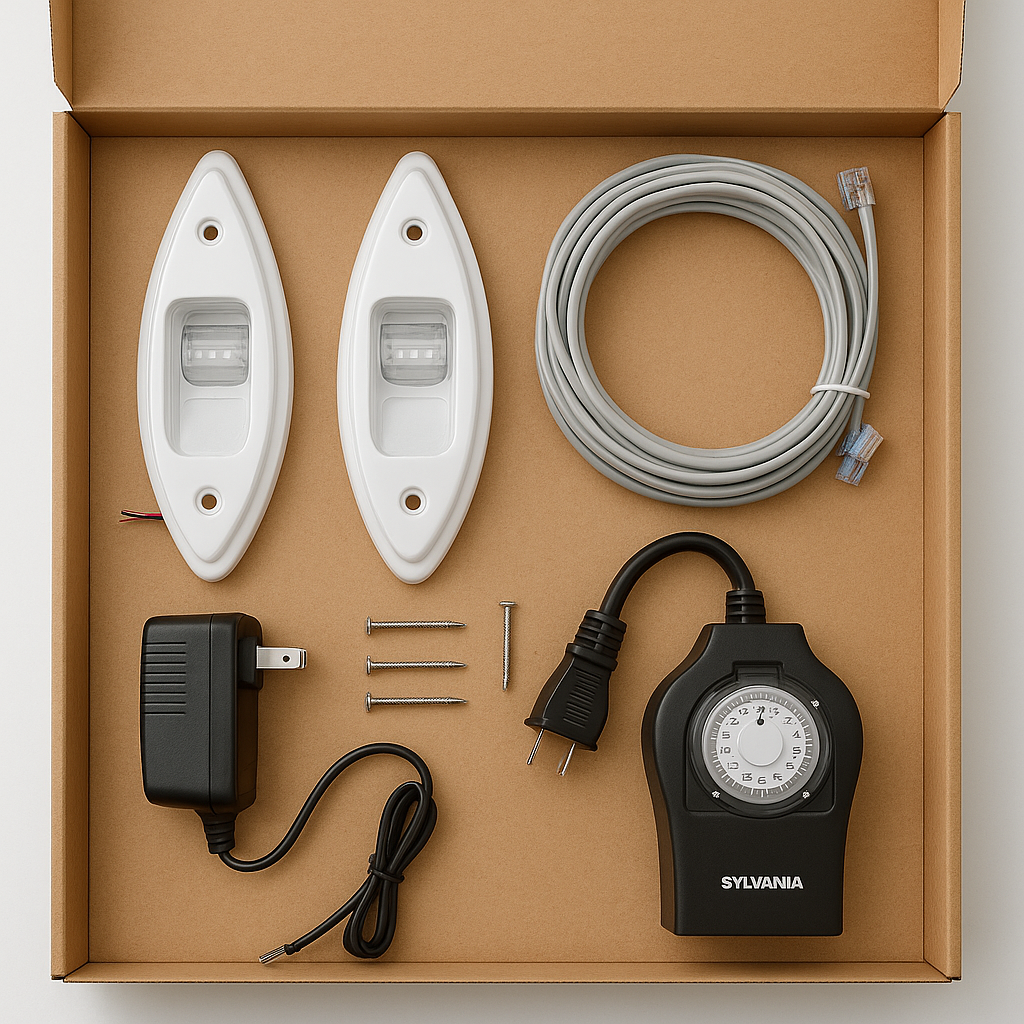
Before you begin, make sure you have all components listed in the parts list. Your package should include both LED lights (red and green), mounting blocks, wire, connectors, power supply, and a heavy-duty outdoor timer.
Step 2: Choose the Mounting Locations
Stand inside your garage with the door open and identify a spot near a power outlet.
When facing out of the garage:
Right side = Starboard (GREEN Light)
Left side = Port (RED Light)

Step 3: Mark the Positions

Using your pencil or marker, mark the exact spots for both lights. Measure the distance from the door opening and the height on one side, then copy the same measurements to the other side so both lights are even.
Step 4: Drill the Mounting Holes

From outside the garage:
Drill a ¼” hole at each marked spot—first for the RED (Port) light, then for the GREEN (Starboard) light.
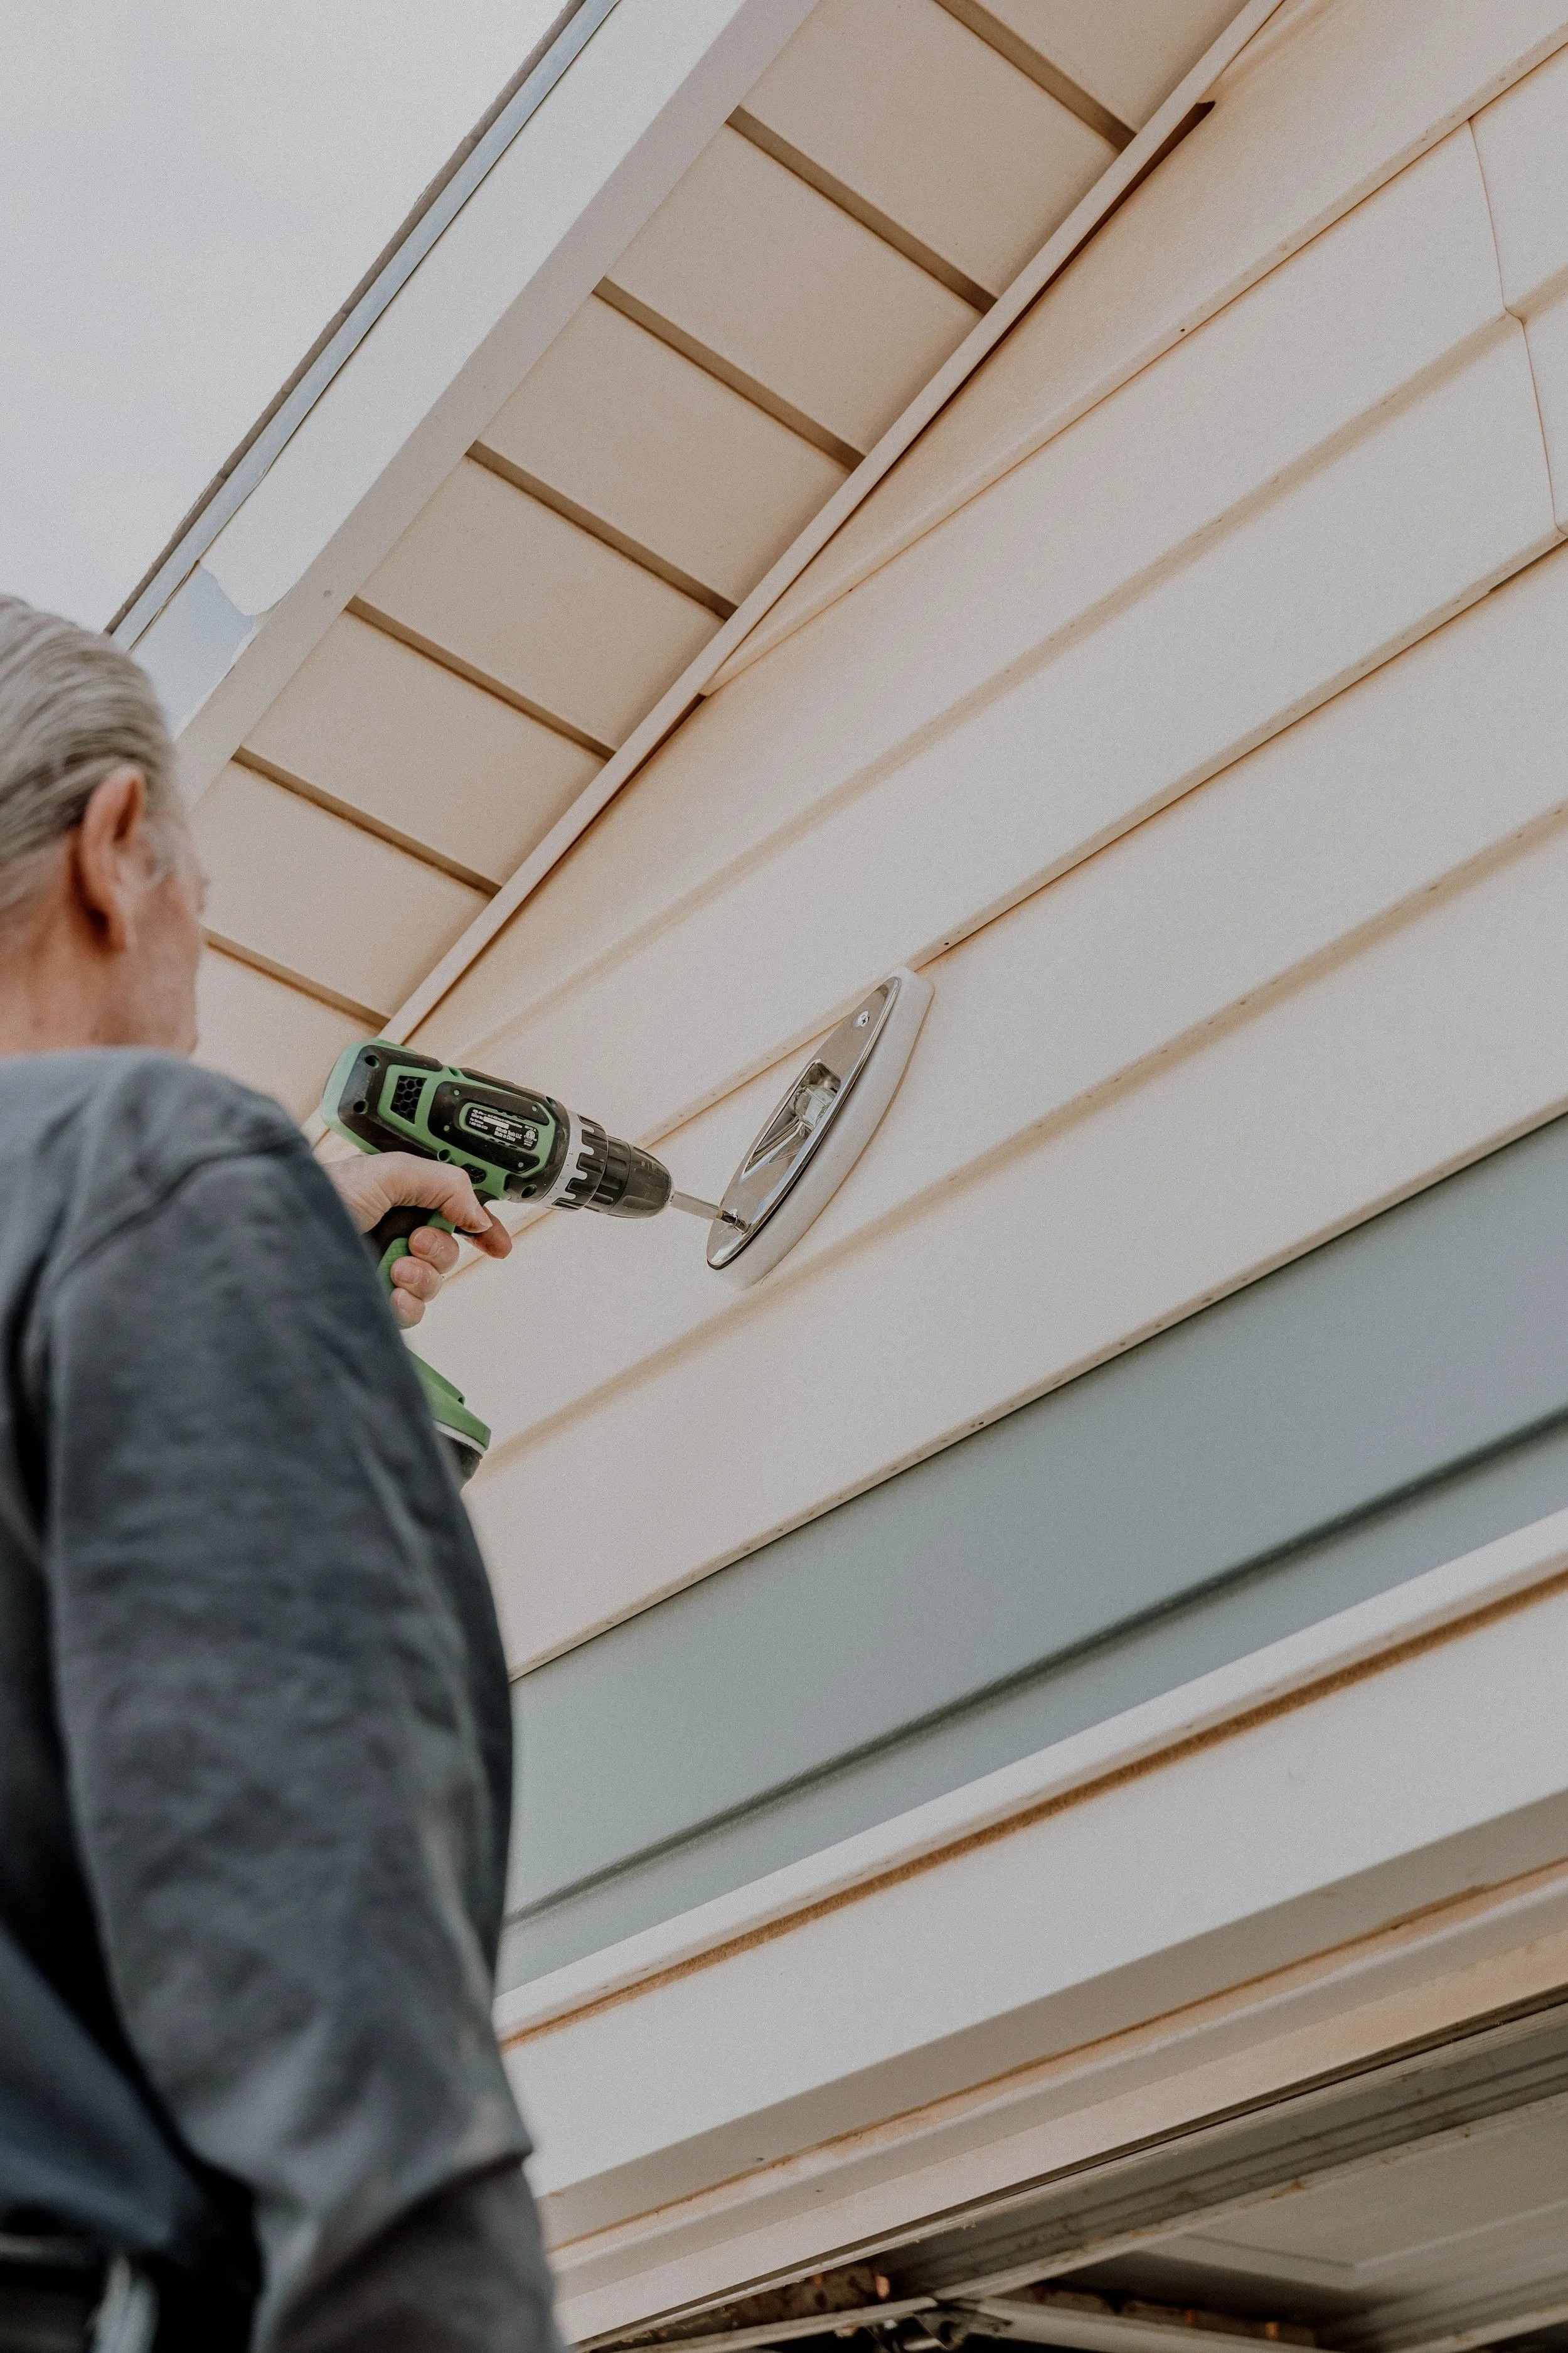
Step 5: Mount the Lights
Take the GREEN Light and align it with its white mounting base.
Insert the two screws through the light and push the red and black wires through the hole you drilled.
Using your power drill, secure the light to the wall.
Slide the shrink tubing over the wire tips before inserting them into the hole.
Repeat for the RED Light on the opposite side.
Step 6: Connect the Wiring
Inside the garage:
Locate the wires from the GREEN Light.
Using the connectors, match Red to Red and Black to Black from the 18 ft wire. Lift the blue tab, insert each wire, then close the tab securely.
Run the other end of the 18 ft wire to the RED Light and connect using the three-way connector (two from the Red Light and one from the 7 ft wire).

Step 7: Power Connection
Connect the remaining end of the 7 ft wire to the Power Supply (match Red to Red, Black to Black).
Plug the Power Supply into the Timer.
Plug the Timer into a wall outlet or outdoor-rated extension cord.
